

Mastering Faux Freckles: Best Practices for Natural Results with Perma Blend
Hi, I’m Nikki Rice, a USA-based Perma Blend Pro Team artist, studio owner, and PMU educator with a deep passion for creating natural, confidence-boosting results. I’ve worked with hundreds of clients and trained aspiring artists across the country, but my love for faux freckles started long before I ever picked up a machine professionally. In fact, my own face was my first canvas.
Like many artists, I started by experimenting, learning through trial and error. Over the years, I’ve refined my technique, gained a deeper understanding of pigment behavior, and built a process I trust. Now, with the right pigments and strategies, I can confidently deliver freckles that look soft, sun-kissed, and authentic, and I want the same for you.
Realism is Key: How to Mimic Natural Freckles
In permanent makeup, realism always reigns, and that’s especially true for faux freckles. The most convincing freckles are imperfect and thoughtfully placed. Freckles typically appear in higher density across areas where the sun naturally hits, the bridge of the nose, cheekbones, and forehead, and then taper off gradually. Keep this sun-kissed logic in mind as you build out your map.
Pro Tips: Avoid “polka dot” spacing; freckles should vary in shape, size, and distance Start with makeup practice to perfect your placement Don’t overdo it. Less is more, and you can always build in future sessions
Color Selection: The Warmth Principle
One of the most common mistakes I see is using pigments that are too cool. Real freckles always carry warm undertones. Early in my journey, I used blonde shades that healed gray or ashy, a major learning moment. Thanks to deeper pigment knowledge and reliable healed results, these are now my go-to Perma Blend pigments for faux freckles:
Tina’s Golden Sunrise - Warm mass tone and undertone, medium opacity
LUXE Ready Mod - Warm mass tone and undertone, low opacity
Forest Brown - Neutral tone, medium opacity
Pro Tip: Tina’s Golden Sunrise is my absolute favorite. When properly diluted with thinning solution like Shading Solution Thin, it delivers a soft, subtle result that truly mimics the real thing.


Technique: Layering for Long-Lasting, Natural Results
The real artistry of faux freckles lies in building them gently. Perma Blend pigments are highly concentrated, so thinning with Perma Blend Thinning Solution is key to keeping results light and natural. Think of it like creating an ombré brow — you don’t press harder, you layer slowly. Stay in the upper layers of the skin to avoid over-saturation or unwanted color shifts.
Common Pitfalls to Avoid:
- Going too deep (can cause pigment to blur or heal too cool)
- Using shades that are too dark or dense (resulting in unnatural appearance)
Pro Tip: Use a light hand, layer gradually, and always prioritize softness over saturation.


My Favorite Faux Freckle Formula
All of my blends are built around Tina’s Golden Sunrise, with adjustments using Ready Mod and Forest Brown depending on the skin tone and desired depth. Here are my go-to's:
Soft Sun-Kissed—6 drops TGS + 1 drop Forest Brown + 3 drops Thinning Solution
Balanced Natural—5 drops TGS + 1 drop Ready Mod + 1 drop Forest Brown + 3 drops Thinning Solution
Light & Delicate—7 drops TGS + 3 drops Thinning Solution
Dimensional Depth—4 drops TGS + 2 drops Ready Mod + 2 drops Forest Brown + 2 drops Thinning Solution
*Note: TGS = Tina’s Golden Sunrise
Final Thoughts: Confidence in Every Freckle
Faux freckles should whisper realism, not announce themselves. With the right colors, strategic placement, and gentle layering — and the trusted performance of Perma Blend pigments — you can help every client feel more radiant and confident in their own skin. Keep refining. Keep learning. And trust in the process, because your artistry is just as beautiful as the freckles you create.
— Nikki Rice
You May Also Like...

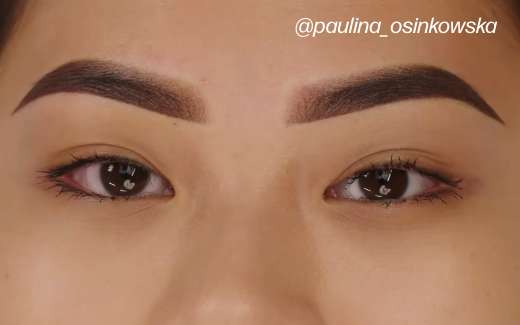
Breaking Down the Perma Blend LUXE x Paulina Osinkowska Ombre Brow Set
Predictable healed results come from more than pigment alone. In this educational guide, Paulina Osinkowska shares the thinking behind the Perma Blend LUXE Ombre Brow Collection, covering pigment behaviour, colour selection, layering, healed result analysis, and the workflow principles that help artists make more informed decisions throughout every brow procedure.
The Polish Brow Revolution: How Paulina Osinkowska Shapes Global PMU Standards
Want to know exactly why Poland sets the global standard for PMU brows? Uncover Paulina Osinkowska's exact methods and the LUXE Ombre Set for soft, healed results.

The Perma Blend Portfolio of Pigments: Classic vs. LUXE vs. Evenflo vs. LUXE Lite
Not sure which Perma Blend formulation is right for you? Explore the differences between Classic, LUXE, Evenflo, and LUXE Lite, and discover how each pigment line supports different techniques, styles, and artist preferences. From trusted versatility to softer, buildable color, find the formulation that fits the way you work.